


Hi Everyone!
As many of you know we are rebuilding/rehabbing our Vintage trailer. We are on a tight budget and trying to DIY everything for our little Aladdin Trailer. When I first saw basket looking lights I knew it would be perfect for the Boho vibe of the trailer... but the price tag was almost the price of the whole trailer 😂 I just couldn't justify it. I have all things mentioned in this blog post linked HERE.
Things needed for this DIY
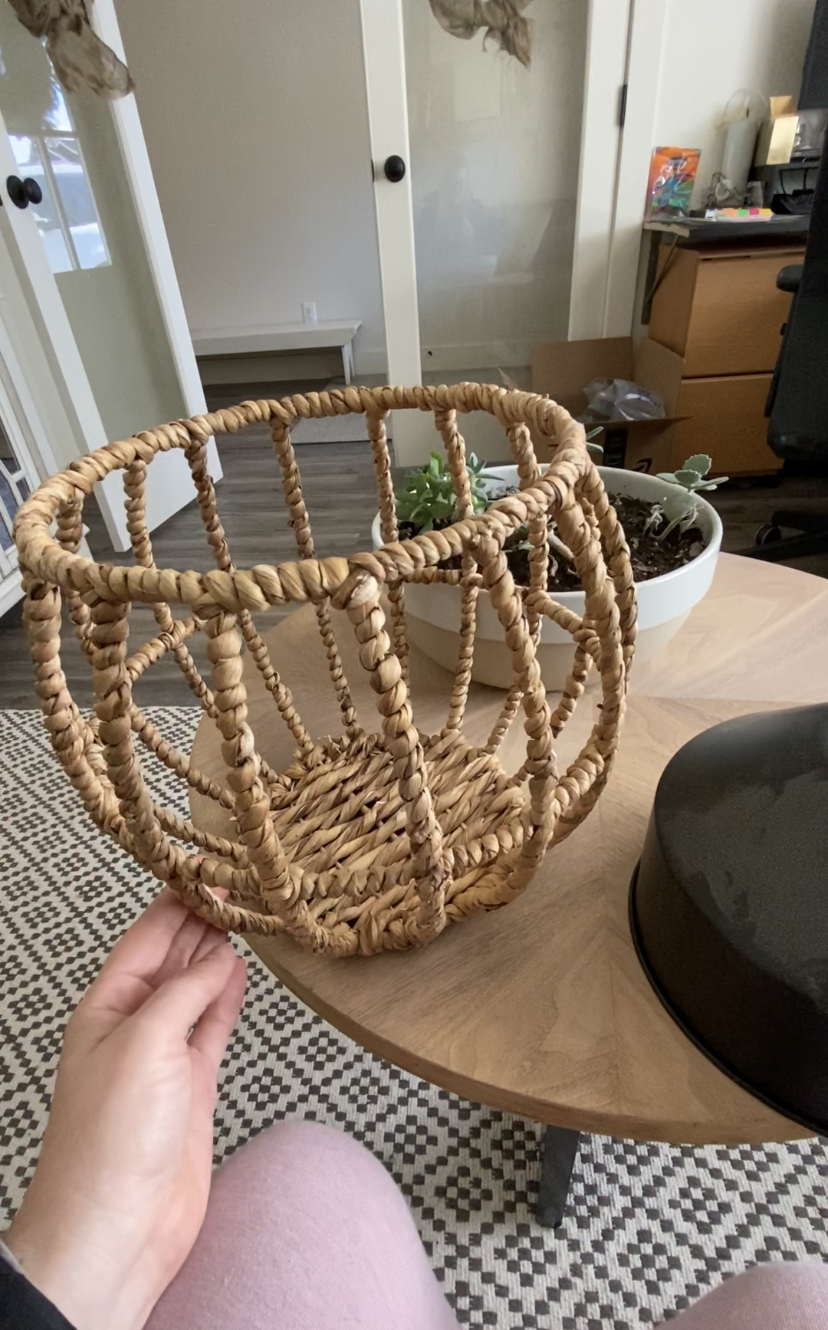
So the hunt for the perfect basket began! There were a few things I was looking for in a basket:
- Smaller in size
- Ability to be cut - and keep shape and structure
- Light in color
- Show light through (it will be the main light for our trailer)
I found the most beautiful basket at Target, but it was too large and made of fabric. Then headed to Hobby Lobby. Of course this is where I hit the jackpot. I actually found 3 contenders, see below.(picture is from my Instagram stories, if you want to see behind the scenes on my DIY's I share everything in my stories on my Instagram, I saved highlight for this pendant light HERE)

Basket 2 and 3 are not sold online
Ultimately I chose the light that was literally shaped like a pendant shade, Number 2 above, like seriously it was screaming to be made into a light! I also chose this one because it'll let a lot of the light out and wont shield the light from going around the trailer.
So my plan was to cut a hole in the bottom of the basket so I could attach a pendant plug in light bulb to it to create my own basket light. I had a discounted plug in pendant that I had previously also gotten at Hobby Lobby that I was not using, so we took the shade off the pendant and measured the circumference of the base of that light so we knew how big to cut the hole. We went a little smaller just to ensure a snug fit, we ended up using a 1-3/4" hole saw bit, see below.

I marked the center of the basket and taped the whole area that will get cut with painters tape on the top and underside. I am not sure if this helped but I have done this in the past to keep wood from splintering off. I didn't have a big issue with shedding/Shredding of the basket weave material so I think I would do it again just to be safe.

I just went for it after this. I have never done this before so I had no clue how this would go! The one thing I wish I would've known was that there was a strong metal wire running down the center of the basket, right where I was trying to cut. The bit did not cut this so it moved my drill bit to the side, which made my hole a little off center but we cut the wire with a hack saw and I was able to adjust where the hole was a little, because the basket weave is a little flexible. It probably is a little off center but you cannot tell.

I then attached the pendant by screwing the basket between the pendant and nut bolt it came with and Voila! It worked!!
I seriously love the look of this light, it is exactly what I wanted and was so simple to do! Afterward I realized I had a white pendant light I had bought previously from Ikea in the clearance section for $3 and I loved it with the basket more than the black pendant (which I also can use somewhere else because it came with a shade already) So in all I ended up spending $17 for the basket and $3 for the light = a total of $20! Way better than the one $299 one from pottery barn (Linked HERE) which is gorgeous but can't beat the price of $20!


What do you think?
Comment below if you have any questions and let me know what you think!
No comments:
Post a Comment